- Sponsored -
How To Add Subtitles To YouTube Videos: Step-by-step Guide
Have been struggling to add subtitles to your YouTube videos? Here's a detailed guide on how to add subtitles to the videos. Know simple and quick tricks to target global audience base via YouTube. One can create regional content and yet target international audience with the help of subtitles on YouTube platform

Video making business on YouTube has become one of the mainstream career options today. All the creators on the platform are in race for garnering more and more video metrics such as likes, subscribers, views count, watch time hours, impressions and reach rates. Alongside the content and SEO on the platform, the video promotions and subtitles matter most when it comes to attracting new visitors on the channel. Subtitles on YouTube videos help creators reach the global audience base. Subtitles allows viewers watch the video which is made in different language (possibly regional ones). Viewers prefer watching video based on the content and video quality. Regional content these days experience a great demand on YouTube and other social media platforms. Thus it becomes crucial for creators to pay attention in adding subtitles to the video. Here’s everything you need to know about adding captions/subtitles on YouTube videos.
- Sponsored -
Importance of adding subtitles to YouTube videos:
The subtitle in YouTube videos allow visitors know the real content of the video, even if its made in different language. This also helps deaf or hard-of-hearing viewers to watch the content and get needed information without any hassle. Subtitles are also one of the crucial steps in video making business, when the target of the creator is to reach international audience base. English is one of the widely spoken language in the world and thus most of the YouTube videos have English language as subtitles.
YouTube Studio has made it extremely easy for creators to add text on any YouTube video. It automatically creates subtitles for the selected video using Google’s voice detection software, It also integrates the text into your video within a matter of second. However, the translation is always not exact. In some cases the translation might be exactly opposite to what one speaks in the video. And that’s when as creator, you are in a need of adding real subtitles with proper punctuations and exact meaning.

How to add subtitles to videos with YouTube Studio?
- Start by signing in to your YouTube Studio
- From the left menu select Subtitles section
- Now click on the video you want to edit
- Then click on the add Language option and then select your language
- Under subtitles, click ADD option. You will soon see the auto subtitles appearing on your videos.
Effective tips for YouTube video subtitles:
- Video subtitles should be in simple and readable formats
- Use special notations to let deaf or viewers with hearing problem know real content of the video
- Produce videos with great audio quality that allows YouTube to detect the language correctly
- If you are transcribing the video, use short lines which won’t made clumsy appearance on the screen
- You can use word-to-word subtitles to give real time experiences
- Synchronize subtitle files with timestamps or the audio files to the original video
- Subtitles are written in the spoken language. While any other text on websites are in readable formats. Know the difference between the two to master the art
- Use correct correct grammar, punctuations and notations in the video

Reasons why auto-synched YouTube subtitles have errors:
If you see your videos (wherein captions/subtitles were auto synced from YouTube Studio) have several errors in the subtitles, then these following could be possible reasons:
- If the audio of your video is in complex language, it might create difficulties for the algorithms to analyse and detect the language
- The language which is used in the video might have not supported for auto-captions feature of YouTube
- If the video is too long for auto-captions, there might be a few errors
- If the video has poor sound quality
- If your YouTube video isn’t recognizing the speech or dialect due to technical reasons
- If there’s a long period of silence at the beginning of the video, it could create an error in auto-captions from working
- If there are multiple speakers in the video. The overlapping speech could create error in the subtitles

Alternate way of adding subtitles on YouTube videos:
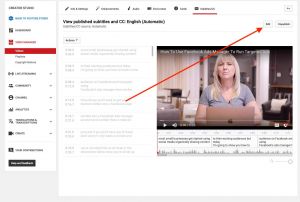
One can add subtitles to YouTube videos by uploading an external file. You can access the upload file page through the Actions menu or by clicking the Upload a file button in YouTube Studio’s section from where you edit the subtitles and captions.
All you need to do is create a file with timeline and text caption which suits the video content. Upload this file on video subtitles section using YouTube Studio. If you choose the Transcript option, you can upload a script text file with no time codes. YouTube will automatically match the script to the words spoken in the video.
Check out the steps to add subtitles to YouTube following the alternate method:
- Select a video file you want to upload on YouTube
- Upload the file and save for auto sync
- You can also select the auto-sync option directly
- Then enter the words in the video or upload a transcript file
- Select the Edit option and then click Save and Close
- You can also Select and type the text manually on video
- Play the video and enter your captions or subtitles as per timeline. You can also pause while typing the text. Easiest way is to keep the dialect ready and copy paste it on the video when playing and pausing
- Once done select the Publish option
For more such updates, stay hooked on to The Live Mirror.
Also Read: YouTube Analytics: Step-By-Step Guide To Using Real Time Data
- Sponsored -
